Basic Compositing: Masks
iMovie Tutorial 2

Effect
Plugin
Composite Masks & Compositing


This tutorial is an introduction to compositing.  Compositing is a very powerful technique for layering clips on top of each other.  By specifying a mask, it is possible to have parts of the background image 
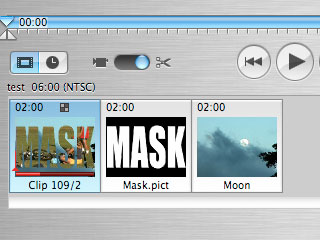
show through the foreground image.  In this tutorial, you will learn how to do simple compositing in iMovie using masks.

What is a mask?
A mask (also known as a matte) is a black and white image (or clip) whose value at each pixel determines it's opacity (or alpha) value.  So a white pixel would indicate an opaque pixel, black a transparent one, and grey values varying degrees of transparency.  Graphic artists may recognize that a mask acts like a stencil.

Advanced note: If a color image is used as a mask, only the red component of the image will be used for the alpha.

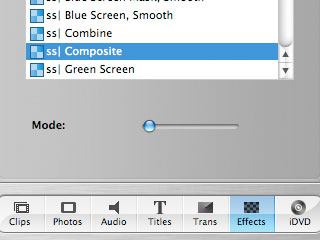
How does compositing work?
In compositing, two images (or clips) are combined in one of several ways using a mask. The most common way is to place one image (the foreground) over another (the background). Where the mask is darker, indicating transparency, the background image will show through the foreground. Where the mask is brighter, indicating opacity, the foreground image will block the background.

Steps

Step 0
Open an iMovie project containing at least two clips of video.


Step 1 Place both clips in the timeline.


Step 2
Create or find an image or clip to use as a mask.  Ideally, the mask should be black and white.


Step 3
Import the mask into iMovie.

Step 4
Place the mask in the timeline, between the two clips.


Step 5
If the mask is a clip, trim the mask so that it is the exact same duration as the first clip in the timeline.  If it is a still image, set its duration to match the first clip.

If the mask is a clip and is shorter than the first clip, then trim the first clip.

(!) It is essential that the first clip and the mask be the exact same length.


Step 6
Select the first clip.


Step 7
Choose ss| Composite in the Effects panel.


Step 8
Click the Apply button.


Step 9
Wait for the clip to render.

Variations

Try playing with the Mode slider of the effect, and notice the various ways in which the mask can combine the two clips.  The first clip is clip A, the second clip is clip B.

The most common modes are A over B and B over A.   The other modes are used for more specialized effects.

Mode Result
A over B
B over A
A plus B
A minus B
A average B

For more tutorials and information about iMovie plugins, please visit www.stupendous-software.com